Product Schedules Quick Start Guide
Here are the simple steps to start using the GSP Product Schedules app straightaway. There are additional ways you can fine-tune the app, but the essential steps are these:
1. Install the app
You do this by clicking Get It Now (no payment details required) from this AppExchange Listing. Choose whether to install the app in your production environment or a sandbox. Either way, we recommend selecting the Install For All Users option.
Remember, you get a free 14-day trial of the app.

If you want to schedule Revenue, follow steps 2, 3, 4 and 5. If you want to schedule Quantity, skip to steps 6, 7, 8 and 9.
Here are the simple steps for setting up the app for Revenue Scheduling:
2. Edit the Opportunity Page layout.
- Add these two fields to the page layout:
# Schedules
Total Schedule Revenue
- Add this Lightning Action:
Manage Schedules - Add the Product Schedules Related List.
3. Edit the Opportunity Lightning Page layout.
- Go to an existing Opportunity in the system.
- Click the cog in the top right corner of Salesforce.
- Click “Edit Page”.
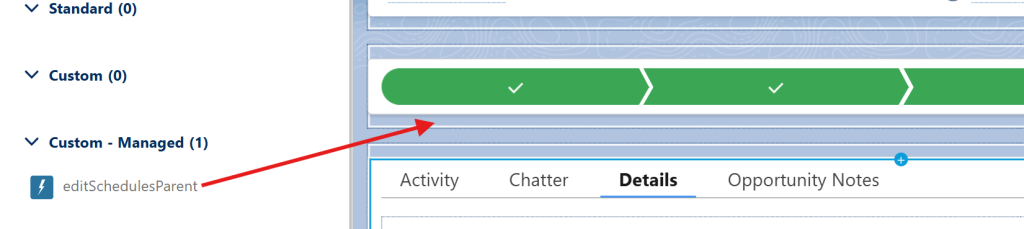
- In the left sidebar, find the “Custom” section.
- Drag “editSchedulesParent” onto the page (typically, we position it below the stage lightning path).
- Click Save.
4. Edit the Opportunity Product Page Layout.
- Edit the page layout and add these fields:
# Schedules
Projection Method
Schedule Start Date
Schedule Type
5. Edit the Opportunity Product Multi-Line Layout.
You’ll find the link for this at the top of the Opportunity Product page layout.
- Move these four fields from the left to the right column and Save.
# Schedules
Projection Method
Schedule Start Date
Schedule Type
Here are the simple steps for setting up the app for Quantity Scheduling:
6. Edit the Opportunity Page layout.
- Add these two fields to the page layout:
# Schedules
Total Scheduled Quantity - Add this Lightning Action:
Manage Schedules - Add the editSchedulesParent via the Lightning Page
- Add the Product Schedules Related List.
7. Edit the Opportunity Lightning Page layout.
- Go to an existing Opportunity in the system.
- Click the cog in the top right corner of Salesforce.
- Click “Edit Page”.
- In the left sidebar, find the “Custom” section.
- Drag “editSchedulesParent” onto the page (typically, we position it below the stage lightning path).
- Click Save.
8. Edit the Opportunity Product Page Layout.
- Edit the page layout and add these fields:
# Schedules
Projection Method
Schedule Start Date
Schedule Type
9. Edit the Opportunity Product Multi-Line Layout.
You’ll find the link for this at the top of the Opportunity Product page layout.
- Move these two fields from the left to the right column and Save.
# Schedules
Projection Method
Schedule Start Date
Schedule Type
9. Leave an AppExchange Review
Click to go to the AppExchange Listing
If you love our app, we’d be thrilled if you could leave a review on the AppExchange. Please help us share the love.
10. Get more help and best practices
We’ll help you set up the GSP Product Schedules app in your Salesforce environment or discuss how it can be further customized to meet your needs.
Don’t hesitate to get in touch via our website.