Add Custom Fields To Filter Pop-Up
Available In Product Schedules 2.181+
By default, our filter pop-up includes “Schedule Start Date” and “Opportunity Product”, allowing users to view individual Opportunity Products and specific schedule timeframes. In some circumstances, this isn’t enough control, and users want to filter based on information exclusive to Product Schedule records in their own Salesforce environment.
Steps to Complete
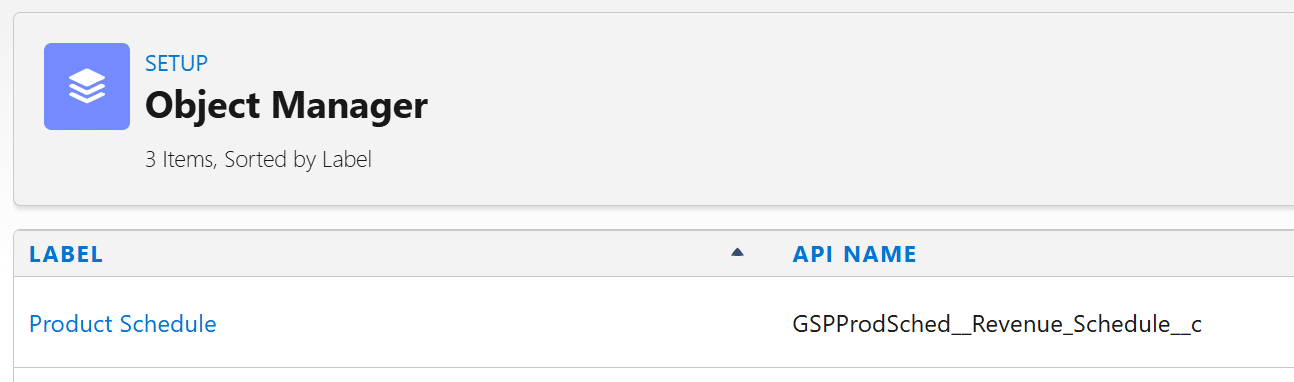
- Navigate to the setup menu and click “Setup”.
- Select the “Object Manager”.
- Find and click the “Product Schedule” object in the Object Manager.
- You can scroll the list or use the “Quick Find” search bar in the top-right corner.
- You can scroll the list or use the “Quick Find” search bar in the top-right corner.
- Navigate to “Field Sets” in the Product Schedule object.
- Find and click the “Product Schedules Filters” field set.
- Drag the required Product Schedule fields into the “In the Field Set” panel.
- Supported field types are Date, Currency, Number, Picklist and Checkbox.
- Click “Save”.
- Navigate to an existing Opportunity in the system.
- Click the “Manage Schedules” button on the Opportunity.
- If you can’t see the “Manage Schedules” button, please ensure you have added the custom button to the Lightning Page.

- If you can’t see the “Manage Schedules” button, please ensure you have added the custom button to the Lightning Page.
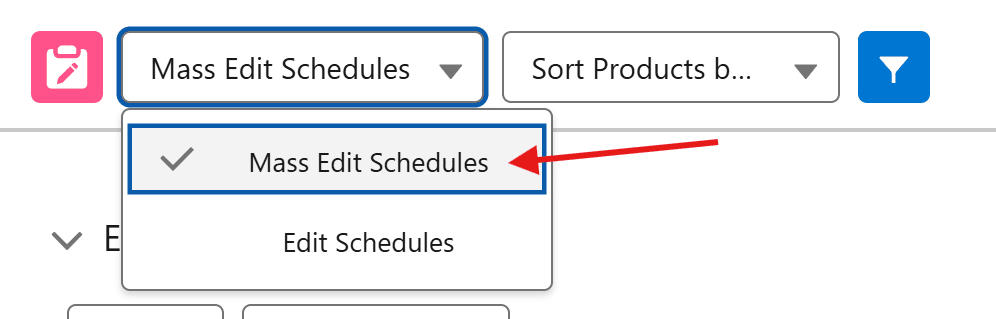
- Confirm that you are in the “Mass Edit Schedules” tab.
- Our “Manage Schedules” component has two areas, “Mass Edit Schedules” and “Edit Schedules”.
- This functionality is exclusively available in the “Mass Edit Schedules” tab.

- Click the blue filter icon in the “Manage Schedules” component header.
- Confirm that your newly added fields are displayed in the filter pop-up as expected.


Outcomes
After you add your custom fields to the “Product Schedules Filters” field set, they will be visible in the filter pop-up immediately.
Troubleshooting
Can I add custom fields from the Opportunity Product?
By default, no; the field set exists only within the Product Schedules object. If you want to refer to data on the Opportunity Product, you can use formula fields (assuming the formula’s return type is supported).
Recommendation:
Create a new formula field on the Product Schedule object, and get the value via the Opportunity Product (Product Schedule > Opportunity Product > Target Field).
Formulas used to fetch a picklist value from the Opportunity Product will not function, as the return type is “Text”. We do not support text due to potential security risks.
When I add a date field, I see two fields on the filter pop-up. Is that normal?
Yes, that is intended functionality. When you add a date field to the field set, we surface two fields on the filter pop-up (from and to).
Recommendation:
Populate the from and to fields for your custom field as required.
Recommendation:
Populate the from and to fields for your custom field as required.
The custom filters aren’t working as expected.
When adding a custom field to the “Product Schedules Filters” field set and including it in a filter, you’re customising the query used to retrieve the Product Schedules in the system. If Product Schedules are not displaying, it is almost certain that the Product Schedule does not match the filter.
Recommendation:
Navigate to the impacted Product Schedule record, review the data, and determine why the Product Schedule did not display when filtered.
Recommendation:
Navigate to the impacted Product Schedule record, review the data, and determine why the Product Schedule did not display when filtered.
Request Further Support
If you’re still having some trouble, we’re more than happy to help. Let us know what you’re struggling with using the form below, and we’ll be in touch as soon as possible.
Was this article helpful?