Setting Up Salesperson and Team Targets
The app enables tracking Product Schedules against monthly salesperson and team targets. Pre-built reports and dashboards provide complete performance and pipeline coverage visibility against the monthly targets.
By default, the app tracks scheduled revenue against target, but you can easily change this to measure scheduled quantity versus target.
Remember, if you need help or support in setting up these relatively advanced features, don’t hesitate to Get In Touch.
Salesperson Schedule Targets
Salesperson Schedule Targets can be created manually or using the Data Loader. Even if you plan to use the Data Loader to create the targets, it’s a good idea to manually create the first target record; you can then export this record and use the resulting Excel spreadsheet as the template for creating other target records.
Optionally, you can fine-tune this by creating ‘types’ of Salesperson Schedule Target.
Salesperson Schedule Targets can be created manually or using the Data Loader. Even if you plan to use the Data Loader to create the targets, it’s a good idea to create the first target record manually; you can then export this record and use the resulting Excel spreadsheet as the template for creating other target records.
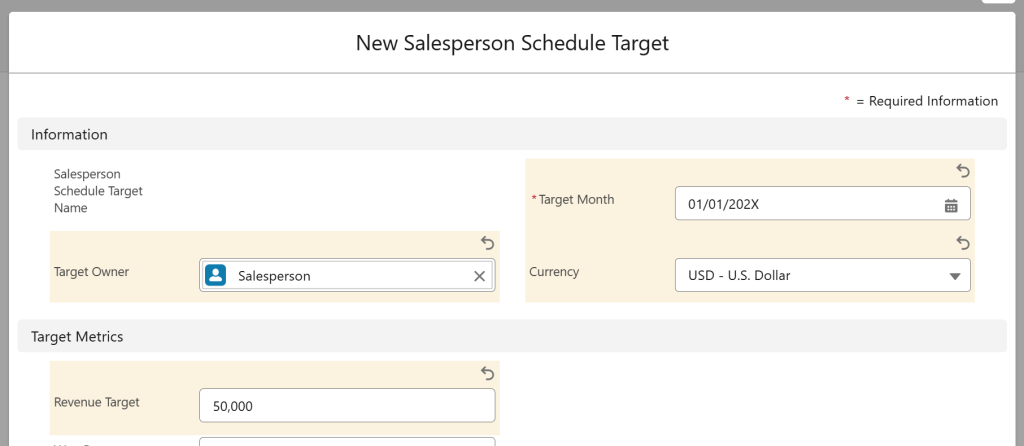
To create Salesperson Schedule Targets manually:
- Navigate to the Salesperson Schedule Target tab.
- Click New.
- Enter the Target Owner (i.e., the salesperson).
- Enter the Target Date (e.g., January 1).
- Optionally, enter the Target Type (see below).
- If using multi-currency, select the Target currency.
- Click Save.
Upon Save, any existing Product Schedules linked to Opportunities the Target Owner owns will automatically link to the Salesperson Schedule Target.
Using the Target Type field
Target Type is an optional field on the Salesperson Schedule Target. It allows you to create, for example, different salesperson targets for new and existing logo opportunities.
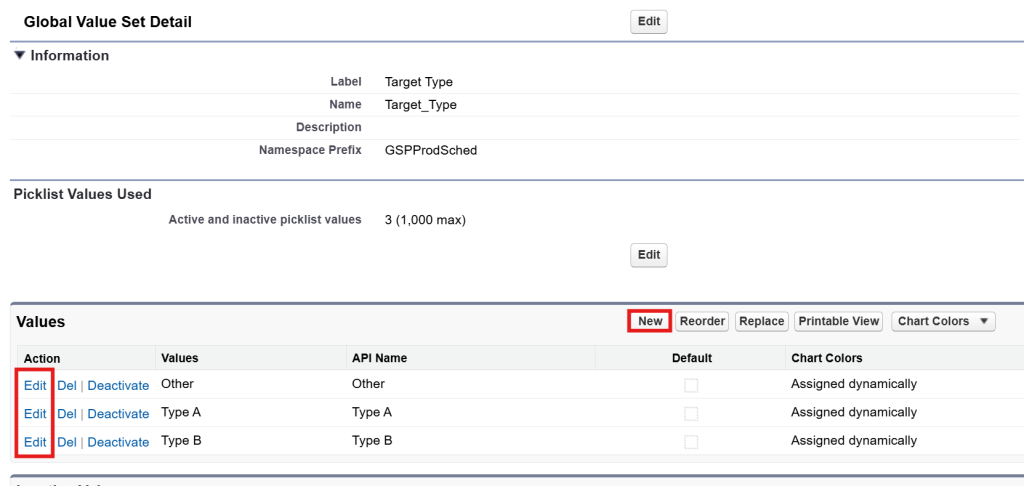
To set up the Target Type field:
- Navigate to Setup, Object Manager, and Opportunity Product.
- Select Fields & Relationships, then the Target Type field.
- In the Values section of the page, click View Target Type Value Set.
- Modify the Target Type picklist values appropriately and Save.
- Update the Target Type on existing Opportunity Products. The easiest way to do this is using the Data Loader.
- Create a Flow, setting the appropriate Target Type field value on new Opportunity Products.
- Create new Salesperson Schedule Targets, setting appropriate values for the Target Type field (you must delete any existing Salesperson Schedule Target records first).
Team Schedule Targets
Team Schedule Targets work similarly to Salesperson Schedule Targets. In other words, Product Schedules link automatically to the target record based on the Team field on both the Opportunity Product and the Team Schedule Target record.
To set up Team Schedule Targets:
- Navigate to Setup, Object Manager, and Opportunity Product.
- Select Fields & Relationships, then Team.
- In the Values section of the page, click View Team Value Set.
- Modify the Team picklist values appropriately (see below) and Save.
- Update the Team on existing Opportunity Products. The easiest way to do this is using the Data Loader.
- Create a Flow, setting the appropriate Team field value on new Opportunity Products.
- Create new Team Schedule Targets, setting appropriate values for the Team field (you must delete any existing Team Schedule Target records first).
It’s up to you to decide upon the Team picklist values. In some businesses, a ‘team’ is a group of Users. However, it can also be the Account’s territory, the Opportunity’s Type, or another value. You can define the Team on the Opportunity Product using fields and data from the User, Account, Opportunity, or Product.
Once again, if you need help with advice on setting up salesperson or team targets, please Get In Touch.