How To Create Custom Fields on Product Schedules
The Product Schedules app has a set of default fields that will suit most businesses. Nevertheless, if you need additional fields unique to your business, you can easily add custom fields to Product Schedules.
Here are the steps to do that:
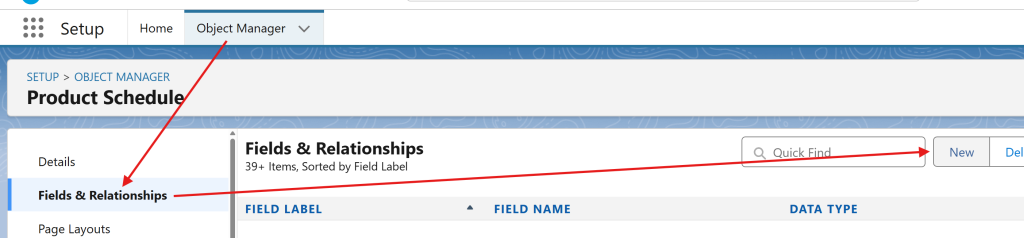
- Click Setup.
- Object Manager.
- Navigate to Product Schedules.
- Fields & Relationships.
- Select the New button.
- Select the appropriate type from the list of field types and press the Next button.
- Set the Field Label to whatever you want your field to be called. Clicking away from the Field Label field will automatically populate the Field Name field. Press the Next button.
- Update the Profile field-level security so only applicable Profiles can view and edit the field. Click the next button.
- Select the page layouts to which the field should be added. Click the Save button.
You’ve now added the custom field to the Product Schedules object. Optionally, adjust the Product Schedules page layout to change the position of the field.
Was this article helpful?